Indoor Propagation Units and Grow Lights: Choosing and Using a Setup
First published in 2015. Substantially updated in October 2026 using horticultural guidance and manufacturer documentation. Garden Gadget Zone has not physically tested the equipment described.
A propagation setup has to solve several separate problems: getting seeds to germinate, giving young plants enough light, keeping their roots suitably warm and moist, and finding somewhere for them to grow afterwards. A lamp can improve a dark windowsill, but it does not automatically turn a cold room into a heated propagator.
Start with the crop and the space you have, then choose the equipment. A few later-sown seedlings may need only a bright windowsill. Repeated early sowings, winter salads or a room with weak daylight can justify a grow light. Bottom heat is a separate purchase decision, based on the crop’s germination requirements and your actual room temperature.
What each part of a propagation unit does
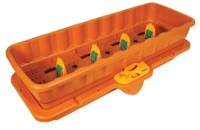
- Seed tray or modules: hold growing medium and roots. Drainage holes allow surplus water to escape into a separate waterproof tray.
- Clear lid: helps retain moisture during germination. It is not a substitute for monitoring temperature or ventilation.
- Heated base or heat mat: supplies warmth. A thermostatically controlled model can regulate its heater; check where its sensor measures temperature.
- Grow light: supplies light above the plants. A stand or adjustable canopy lets you maintain the clearance specified for that lamp as the plants grow.
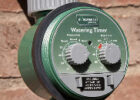
- Timer: controls the light period. It does not measure plant health, compost moisture or temperature.
A complete kit is convenient only if its components suit the same job. Compare usable tray space and clear growing height, not just the outside dimensions. A compact unit suitable for lettuce seedlings may run out of height long before a tomato reaches its final size.
Plan the plants before buying the lamp
Check the seed packet’s sowing season, sowing depth, light requirement and germination temperature. Not every seed benefits from early indoor sowing. The RHS vegetable sowing guide distinguishes crops sown in their final position from those raised under cover. Tender crops need a protected route from germination through to suitable outdoor planting conditions.
Write down how many plants you can actually accommodate after potting on. Four full trays of seedlings can become far more pots than one light stand will cover. Plan staggered sowings where appropriate, and leave room for labels, watering and inspection. For a small harvest rather than transplant production, choose compact herbs or leaf crops; a small propagation lamp should not be assumed adequate for a mature fruiting crop.
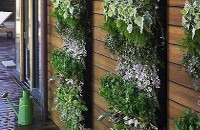
If the plants will ultimately go onto a wall, patio or balcony, our vertical edible-growing guide helps plan their final containers and supports before you raise more seedlings than the space can hold.
Choosing a grow light without being misled by the label
Look for a horticultural fitting with a stated growing area, mounting instructions and suitable electrical protection for its intended location. “Full spectrum” alone does not tell you how much usable light reaches a tray. Electrical watts describe power consumption, not the amount of plant-usable light arriving at every seedling.
If a supplier provides a PPFD map, it describes the density of photosynthetically active photons reaching an area at a stated distance. The University of Minnesota Extension lighting guide distinguishes these measurements. The centre reading alone can hide weak edges. Ask what mounting height, lit area and dimmer setting the figures assume. You do not need to buy a meter to begin, but comparable measurements are more useful than an unsupported claim that one small lamp replaces a much larger fitting.
LED and fluorescent systems should be assessed as complete fittings. LED options can offer lower electricity consumption for a suitable setup, but replacing the tubes in an old T5 fitting is not automatically a safe LED conversion. Check the exact replacement lamp and the manufacturer’s compatibility instructions. Keep a working older system if it still does the job and has safe, obtainable replacement parts; do not assume all T5 products have disappeared.
The RHS guide to artificial lighting explains how supplemental light can help indoor plants and early seedlings. Its example timings and distances describe particular setups, not universal instructions for every modern LED. Follow the lamp’s recommended starting distance and adjust to the crop’s response. Avoid copying a close mounting distance from an unrelated light.
A current example and the older unit pictured here
This page originally described a Grow Light Garden with two 24W T5 fluorescent tubes. Its measurements and claimed lamp life belonged to that older listing and should not be transferred to another model.
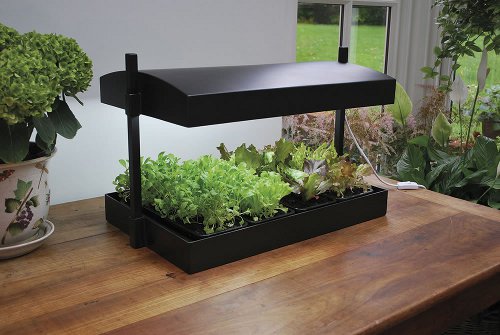
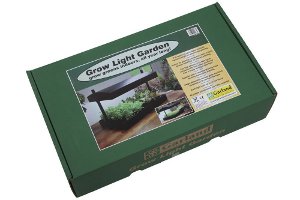
Garland currently lists the Grow Light Garden LED Black, G262B, with two 16W lights, four trays, capillary matting and an adjustable canopy. The manufacturer gives outside dimensions of 62 × 40 × 47cm and a maximum canopy clearance of 38cm from the base. Crucially, it describes the unit as providing light, not heating. Check available growing height after adding your pots.
A different option is Garland’s G271 30cm LED propagator light kit: two 8W lights intended for compatible smooth clear covers. Its suction fittings are not suitable for ridged surfaces. This illustrates why an add-on kit must be checked against the actual propagator rather than bought on length alone. These are documented examples, not comparative test winners; confirm the exact contents before ordering.
Set up the growing area
- Choose a stable surface. Allow for the weight of wet trays and keep the setup clear of curtains, loose cables and places where it can be knocked over.
- Separate water from electrics. Use the supplied power equipment, keep plugs and connections dry and follow the fitting’s location restrictions. An indoor lamp is not automatically suitable for a damp greenhouse.
- Check temperature at plant level. Room air, the compost and the space under a closed lid can differ. A minimum/maximum thermometer helps reveal overnight lows and daytime heat, but an air sensor does not measure root temperature unless designed and positioned for that purpose.
- Set a repeatable light period. Use the lamp and crop guidance, give plants their appropriate dark period, and check the timer after a power interruption. More hours are not a cure for insufficient light intensity.
- Label the trial. Record the crop, sowing date, lamp height, timer setting and any changes. Adjust one factor at a time so a problem is easier to trace.
Watering, ventilation and early growth
Use clean trays and suitable fresh seed-sowing medium, sow at the recommended spacing, and check moisture rather than watering because a fixed number of days has elapsed. Drain surplus water. Capillary matting needs correct contact and a suitable reservoir arrangement; test it with the actual trays before relying on it during an absence.
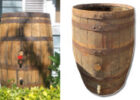
The RHS damping-off guidance identifies overcrowding, excessive moisture and poor air circulation as important risk factors. Open vents or remove covers as appropriate after emergence, and do not keep seedlings permanently enclosed simply because the unit has a lid. For seedlings, the RHS prefers mains water where possible; rainwater needs particular care over storage cleanliness. Our rainwater-storage guide covers the container and debris-control side of that decision.
Inspect edge trays as well as the centre. Leaning or stretched seedlings may indicate insufficient or uneven light; bleached or scorched growth calls for checking excessive light, heat and moisture stress. Do not diagnose every yellow leaf as a lighting fault: roots, nutrition and watering also matter. Photographing the same tray periodically can make changes easier to see without claiming a precise light measurement.
From seedlings to the garden
Prick out or pot on at the appropriate stage for the crop, handling young plants gently and allowing enough room for roots. Reduce unnecessary germination heat once that stage has passed, according to the plant’s needs. A bright warm shelf cannot hold every seedling indefinitely while you wait for outdoor conditions.
The RHS hardening-off guide recommends gradual acclimatisation, typically over two to three weeks. Begin in sheltered conditions and increase exposure as weather permits. Hardening off does not make a frost-sensitive plant frost-hardy. Keep suitable protection available and do not treat the calendar as a guarantee against frost.
Running costs and what to check before purchase
Estimate electricity from actual input power: watts ÷ 1,000 × hours used = kilowatt-hours. A 32W lamp running for 14 hours uses approximately 0.448kWh per day before any separate heater or other equipment. Multiply by your own electricity unit rate. This is an illustrative calculation, not a recommended schedule or a measured bill; a thermostatic heater’s consumption depends on how often it runs.
Before buying, confirm usable tray area, pot clearance, mounting security, timer compatibility, replaceable parts, the correct UK power supply and the support available for the exact generation. Include growing medium, trays, a thermometer and any necessary heating in the budget. The best-value setup is the smallest reliable one that supports the plants you have room to grow on.