Water Timers: Choose, Connect and Set a Garden Controller
First published in 2015. Updated in October 2026. Researched from manufacturer instructions and horticultural guidance; this is not a hands-on product test.
A garden water timer opens and closes a water supply for a set period or schedule. It is useful for repeat watering, but it cannot tell whether an unmonitored pot is wet, whether a dripper is blocked or whether a hose has come loose.
Choose the controller around the supply and the plants it serves. Our automatic watering system guide covers pipework, drippers and complete layouts; this page focuses on the timer and how to use it.
Mechanical, electronic or connected?
- Mechanical countdown timer: you start a watering session and it shuts off after the chosen duration. A basic countdown unit is not a repeating holiday schedule. Check the actual functions rather than assuming every product called a timer starts itself.
- Electronic tap timer: battery-powered scheduling can repeat watering without daily intervention. Compare available start times, days, intervals and the shortest practical duration.
- Multiple outlets or zones: useful for plants needing different schedules. Check how many outlets are independently programmable; some multi-outlet units include an untimed manual outlet.
- App-connected controller: useful when programming at the tap is awkward, or for remote changes where supported. Bluetooth control nearby is different from internet access while away. Confirm whether a hub is required and what happens if the connection fails.
A rain-delay button usually pauses a programme for a selected period; it does not necessarily detect rain. Automatic rain or soil-moisture responses require the relevant supported sensor or service. An outdoor rain event may justify pausing garden beds while greenhouse pots still need water.
Check the connection before the features
Identify the tap thread, inlet adaptor and outlet connector, including regional standards. A UK threaded tap fitting and a US hose-thread fitting are not interchangeable merely because both are described as three-quarter inch. Compare the exact specification and obtain the correct adaptor rather than forcing a thread.
Check minimum and maximum operating pressure, permitted water temperature and any minimum flow. Pressure at the timer and pressure required by downstream drip equipment are separate checks. A controller that works on a pressurised tap is not automatically suitable for a gravity-fed water butt.
For a large layout, establish whether the timer passes enough flow for the intended zone. For a tiny layout, check the opposite: too few low-flow emitters may fall below the controller’s stated minimum. Buying extra schedules does not resolve a hydraulic mismatch.
Two documented regional examples
UK: GARDENA Water Control Select 1891-28
The UK Select 1891-28 supports three watering schedules and uses one 9V alkaline battery, not included. Its listed operating range is 0.5–12 bar, with G3/4 and G1 tap threads. It is not an app-controlled model; a compatible soil-moisture sensor is optional.
The Select operating manual also specifies a minimum water output of 20–30 litres per hour. It gives ten 2-litre-per-hour drip heads as an example and identifies insufficient flow as a possible cause of failure to close. This makes the matching manual particularly important for a small collection of pots. Confirm the instructions supplied with the exact unit.
US: Orbit 62061N single-outlet timer
The US Orbit 62061N product listing specifies two AA batteries, watering durations of 1–240 minutes, intervals of six or twelve hours or one to seven days, and a one-, two- or three-day rain delay. Its model-specific page lists 25–100 psi operating pressure.
Orbit’s broader support information gives a different minimum for a group of timers. Use the matching product label and manual, and ask the manufacturer to resolve any conflict before installation. Neither regional example is a claim of universal compatibility or comparative superiority.
Connect it without creating a leak
- Turn the tap off. Inspect the washer, inlet filter and threads; replace damaged parts with the correct items.
- Fit the timer in the orientation specified by the manufacturer. For the Select, this is vertical with the connection nut uppermost.
- Support the attached hose so it does not pull on the controller. Follow the instructions for hand tightening and seals; excessive force can damage plastic fittings.
- Connect the required downstream irrigation components. Confirm any backflow-protection requirement with the supplier or installer; the timer itself should not be assumed to provide it.
- Open the supply and test a manual cycle, then verify that flow stops and all pressurised joints remain dry.
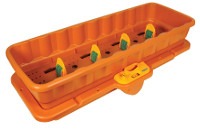
The old article suggested placing a Kingfisher timer among the plants. A tap-mounted controller belongs at its specified supply connection. The photograph below is retained for historical context; the old model’s current availability and specifications have not been established.

Build a schedule from the plants’ response
Set the clock and day, then choose a start time, duration and repeat pattern. Check that the programme is enabled and the controller has returned to its automatic-running mode. Early morning can be a convenient time to inspect the result, but a timer’s menu cannot determine your plants’ water requirement.
Begin with a supervised run and measure outlet delivery. Inspect moisture below the compost surface and adjust. A short repeat interval may suit some small exposed containers, while deeper soil or larger pots need a different approach. Avoid treating a manufacturer’s maximum number of daily cycles as a recommended schedule.
Check every zone after changes. Prevent overlapping runs if the supply cannot support them, and remove obsolete programmes. Reassess after rain, a heatwave, repotting or crop removal. A moisture sensor must represent the plants in its zone, not just the wettest pot.
Before leaving, and before winter
Use the specified battery chemistry and replace a weak battery before relying on the timer. Check whether the clock and programme survive replacement. Observe several automatic cycles before a holiday, including shutoff, and leave someone access to inspect the actual plants. The RHS holiday-garden advice treats watering as preparation rather than a last-minute installation.
If watering stops, check the supply, battery, clock, enabled schedule, rain delay and sensor state before changing the programme at random. If water continues, turn off the tap and consult the manual. For the Select, removing the control panel during watering leaves the valve open until it is refitted.
Follow the maker’s winter instructions. The Select manual calls for dry, enclosed, frost-free storage of both controller and valve unit and removal of the battery for storage. Outdoor weather resistance is not proof of frost resistance.
Product links here are non-affiliate manufacturer links. The old Amazon recommendations have been removed; no claim is made that the historical Kingfisher timer remains on sale.