Automatic Watering Systems: Plan a System That Fits Your Garden
First published in 2015. Updated in October 2026 using horticultural guidance and manufacturer documentation. Product examples have not been physically tested by Garden Gadget Zone.
An automatic watering system needs to do more than switch on a tap. It must deliver enough water to the right root zones, at a rate the soil or compost can absorb, then stop without leaving leaks. The useful starting point is a plan of your plants and water supply, not the number of pots printed on a kit.
This guide covers the complete system: supply, pipework, emitters, controls and checks. For the controller itself, use our water timer selection and setup guide.
Match the watering method to the planting
- Patio pots and containers: individual drippers let you position water at each pot. Different pot sizes and crops may need different numbers or outputs of drippers.
- Hanging baskets: route and secure small supply tubes so they cannot pull out as baskets move. Include their height and exposure when planning the system.
- Greenhouse crops: individual outlets suit pots and growbags; drip lines can suit planted beds. Do not assume outdoor rain has watered plants under glass.
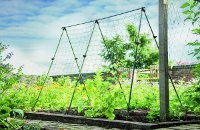
- Vegetable beds: runs of drip line can follow rows. Match emitter spacing and run length to the crop layout and the manufacturer’s design limits.
- Mixed borders: separate plants with substantially different water needs rather than giving every plant the same timed dose.
The RHS comparison of watering methods distinguishes drip lines from porous soaker hoses. A drip line has defined outlets; a porous hose seeps along its length. Neither label guarantees an even result on every slope or at every pressure.
Sketch the layout and decide on zones
Mark the tap or tank, each planting area, changes in height, paths and the longest pipe run. Group plants with similar watering needs. A sunny tomato growbag and a shaded herb pot may be close together but need different treatment.
A zone is a group watered together. Separate zones are useful when schedules differ or the supply cannot run everything at once. A splitter alone does not create independent timing: that requires separately controlled outlets or suitable valves. Run zones one after another if simultaneous demand exceeds the supply.
Iowa State’s drip-irrigation guide explains layout, zoning and measuring supply flow. As a planning check, time how long the tap takes to fill a container of known volume. This estimates open-tap flow; it does not measure the pressure or flow remaining after a timer, filter and long pipe run.
Check pressure, flow and every component
Pressure drives water through the system; flow is the volume delivered over time. A powerful tap can still be unsuitable without pressure reduction, while a raised water butt may not provide enough pressure for a tap-fed kit.
Use the maker’s specifications for the whole combination. Check the controller’s minimum pressure and minimum flow, the regulator’s requirements, tubing limits and the emitters’ working range. Pressure-compensating drippers are designed to even out delivery within a specified operating range; they cannot make an unsuitable supply work.
A typical system uses a controller, an appropriate filter and pressure regulator, a supply line, smaller distribution tubes or drip lines, and end closures. The required order and fittings depend on the kit. University of Minnesota guidance explains why filtration and pressure regulation matter. Ask the supplier to match filtration to the water and emitters, particularly with stored rainwater. A mesh filter removes debris; it does not make water drinkable.
Confirm the tap connection and appropriate backflow protection for your installation with the supplier or a qualified installer. Do not assume a timer provides it, or add fertiliser to a mains-connected system without the correct safeguards. Check current local watering restrictions before use.
Tap-fed, gravity-fed or pumped from a tank?
Tap-fed kits suit a compatible outdoor supply and often include a regulator. Check that the supply will remain available and that the assembly is intended to stay under pressure between cycles.
Gravity systems need components explicitly suited to low pressure. Delivery depends on the height of the water above the outlets and changes as the tank empties. Test at a low water level as well as when full. Do not raise a heavy tank on an improvised support to make a mismatched kit work.
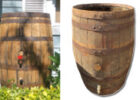
Pumped tank systems can serve locations without a convenient tap. Verify suction and delivery-height limits, dry-run behaviour, water quality, power and reservoir capacity. Solar-powered does not mean unlimited water or guaranteed operation in every light condition. Our water butt and rain-barrel guide covers storage, overflow and suitable uses for collected water.
Hozelock examples: distinguish the kit generation
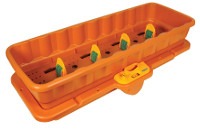
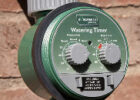
Our original article described a 20-pot Hozelock kit with an AC1 timer. The current UK Hozelock 20 Pot Watering Kit, SKU 2803 1240 instead lists a Select Controller, pressure reducer, 15 metres of 4mm micro tube and 20 nominal 4-litre-per-hour drippers. Check the box contents and controller instructions before buying or extending an older kit.

For stored water, the manufacturer separately lists the Solar Select Irrigation Kit, 100-101-033, with 20 drippers and compatibility with water butts. These are different approaches, not interchangeable controllers for an otherwise identical installation. Both are UK-facing examples; verify the local model and fittings when buying in another market.
Install, measure and adjust
- Lay out the tubing before cutting it. Keep routes clear of feet, mower paths and sharp bends; secure hanging and vertical sections.
- Follow the kit instructions for flushing debris out of the lines before fitting or closing the outlets.
- Run a short supervised cycle. Inspect joints, the first and last outlets, high points and any containers that are easy to overlook.
- Collect water from representative outlets for a measured time. Compare delivery rather than assuming every dripper performs identically.
- Check moisture within the root zone after watering. Increase or reduce delivery according to the plant, container and weather; avoid repeatedly flooding already-wet pots.
For arithmetic only, a dripper actually delivering 4 litres per hour supplies about one litre in 15 minutes. That is not a recommended dose for every pot. Multiply measured delivery by the number of outlets and daily cycles when estimating tank use, then allow a reserve and recheck as plants grow.
For vertical edible planting, check the top and bottom containers individually. Runoff from an upper pot is not a dependable watering system for the pot below. In a greenhouse, review watering alongside temperature records; more frequent irrigation cannot replace adequate ventilation.
Holiday checks and ongoing maintenance
Commission the system well before leaving and observe several scheduled cycles. Check batteries, available water, open taps, secured tubes and actual shutoff. Leave a simple layout and instructions for someone who can inspect the plants. Neither an app nor a timer proves that every dripper is flowing.
If only one pot stays dry, inspect its tube and emitter first. If a whole branch is weak, check kinks, filter blockage and excessive demand. If the tank drains unexpectedly, stop the system and check for leaks or siphoning using its instructions. Clean filters and service drippers as specified; do not enlarge outlet holes to clear them.
Before freezing weather, follow the component manuals for draining lines and removing vulnerable timers, pumps and fittings. Recommission and inspect for leaks next season. Targeted watering can reduce waste, but no fixed saving is promised: a leak or an excessive schedule can undo the benefit.
The product links above are non-affiliate manufacturer links. No current stock claim is made for the old AC1 kit, and no prices are quoted.