Automatic greenhouse window openers: choosing and fitting one
First published in 2015. Substantially updated on 1 October 2026. This is a guide based on supplier documentation, not a hands-on comparison test.
An automatic greenhouse window opener opens a vent as the greenhouse warms and closes it as the temperature falls. It can save repeated trips to adjust a window, especially when you are away during the day. The useful purchase is the one that fits your vent, has enough lifting capacity and can be serviced later.
It is one part of ventilation: an opener cannot make an undersized vent move more air, water your plants or guarantee a particular growing temperature. The RHS notes that automatic openers respond slowly and may need supplementary manual ventilation. Plan around the greenhouse and its crops, then check the result with a thermometer.
How a heat-operated opener works
In a wax-cylinder opener such as a Bayliss Autovent, warming wax expands inside a tube and moves a piston. The linkage lifts the vent; as the wax cools, a spring helps close it. No mains supply or battery is needed. “Solar powered” in this context means responding to warmth, not generating electricity with a solar panel. Bayliss explains the mechanism and its response time.
Opening and closing are gradual. The temperature at which movement starts is not necessarily the temperature at which the vent is fully open. Nor is a thermal opener a rain sensor: a warm shower does not guarantee that it will close.
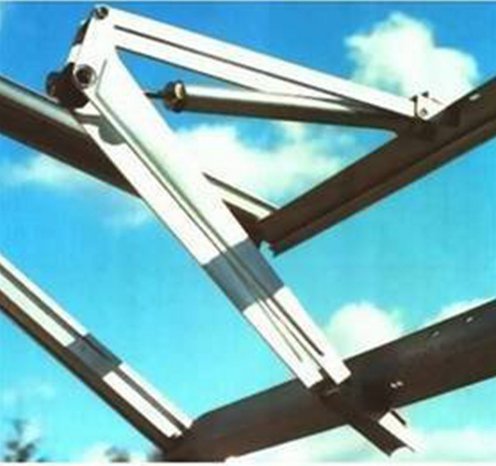
Check compatibility before ordering
- Vent and hinges: identify the greenhouse model and whether this is a roof vent, side vent or cold-frame lid. Check that the opener supports that arrangement and that the vent moves freely.
- Load and opening distance: use the maker’s load-measurement method. Load at the attachment point is different from the weight of a detached window. Confirm enough travel and clearance without forcing the mechanism.
- Frame and fixings: photograph the aluminium profile or timber frame and send the details to the supplier. Clamp-on kits are not automatically suitable for every bar shape; timber may require a different fixing arrangement.
- Wind exposure: ask about the vent’s size and exposure as well as its weight. A light but broad window can still need a more suitable closing or damping mechanism.
- Future repairs: establish the replacement-cylinder model and whether brackets, springs and adjusters are obtainable.
Verified examples: match the application, not just the name
UK: Bayliss XL and alternatives for other vents
The Bayliss XL Autovent is a clamp-on model with a stated maximum lifting load of 5.5 kg and an opening of approximately 12 inches (30 cm). Its manufacturer flags additional fittings for Halls and Robinsons greenhouses. These are model-specific figures, not a universal rating for greenhouse openers.
Bayliss positions the XL for sheltered, lightweight aluminium vents. Its selection and maintenance FAQ points towards the Mk 7 family for other applications, including timber, side vents and more exposed positions. Ask which version suits your window before substituting one for another.
US: check the exact Univent application
Johnny’s Selected Seeds lists a Univent opener, product 9033.0, for bifold cold-frame covers, with an adjustable starting range of 60–77°F (about 16–25°C). Its listing links fitting instructions. Do not assume this specific kit is a drop-in replacement for a greenhouse roof-vent opener.
Our former US section combined the Univent name with an Amazon link naming another product. We have removed that recommendation rather than carry its conflicting load and temperature figures into this guide. The examples here are starting points for checking fit, not a claim that either is best for every greenhouse.
Fitting and setting the opening temperature
Read the illustrated instructions before dismantling the existing stay. Arrange safe access and support the vent while fitting; do not let its weight hang from a partly secured opener. Follow the specified preparation, fixing positions and alignment for your model.
The Bayliss XL instructions show central mounting and the required linkage alignment when closed. They explain setting the opening point with a thermometer near the unit. Follow that procedure rather than treating adjustment as an exact digital thermostat setting.
Watch the vent through a warming and cooling cycle before relying on it while away. Check for binding, loose fixings and obstructions. Our greenhouse thermometer article explains the related monitoring task; its older product listings need a fresh check before buying.
Maintenance and replacement cylinders
Keep the model details and instructions. Follow the maker’s cleaning and lubrication guidance, and inspect the mechanism if movement becomes unreliable. Check fit and adjustment before assuming the cylinder has failed.
Winter instructions differ: Johnny’s advises removing its Univent or cylinder for winter storage, whereas Bayliss says its units need not normally be removed. For a leaking Bayliss power tube, replacement is the appropriate repair rather than attempting to refill it. Use the correct replacement part and its fitting instructions.
Before a holiday, test the ventilation and arrange watering separately. Our automatic watering article covers that companion task, with historical product details that also need checking.
The manufacturer and merchant links in this guide are non-affiliate links. Product information was checked on 1 October 2026; confirm fit, stock, delivery and replacement parts with the supplier before ordering. The site’s general affiliate disclosure still applies to other product links elsewhere.